- 1 box vanilla or spice cake mix
- Ingredients called for on cake mix box
- Optional: cinnamon or pumpkin pie spice
- 1 16 oz jar of vanilla frosting
- 1 ½ cup Chocolate candy melts various colors – your choice
- Vegetable or canola oil
- Sprinkles to decorate optional
-
Preheat the oven to 350. Mix the cake mix according to package directions. For a fall variation, you can mix in 1 tsp of cinnamon or pumpkin pie spice into the batter.
-
Spread the cake batter out onto a baking sheet and smooth with a spatula. Bake for 20 minutes. When the cake is finished, let it cake cool completely.
-
Once it’s at room temperature, crumble the whole cake by hand into a large bowl or stand mixer bowl. Break up all the large crumbles into small pieces.
-
With the mixer speed on low, add in all the frosting one spoonful at a time. The consistency will start to become wet and coarse. If the mixture is dry, add in more frosting, but be careful to not let it get too moist and become a paste!
-
Roll out all of the cake pops into about a 1-inch ball using your hands. Set aside into a container. Once all the balls are rolled, place the container into the freezer for a minimum of one hour.
-
While frosting the cake balls, they need to remain very cold. Only take out a few balls at a time to work with and keep the rest in the freezer. While working in batches, pick the color you’re going to frost with first if you’re using multiple different colored chocolate.
-
In a small microwaveable bowl, pour in ¼ cup of the chocolate melts to coat 4 pops or ½ cup to coat 8 pops. Heat in the microwave for 2 minutes, but stopping to stir every 30 seconds.
-
Pour in 1 tsp of canola or vegetable oil if you melted ¼ cup of chocolate melts, 2 tsp if you used ½ cup, and so on. Stir well into the chocolate. This will make your chocolate very runny and will easily coat the cake balls. It also adds shine to the color.
-
At this point, you can decide to either keep them as cake balls and simply spoon the melted chocolate over the balls or you can attach lollipop sticks.
-
LOLLIPOP STICKS: To turn the cake balls into cake pops, first you’ll take your lollipop stick and dab the end in the melted chocolate. This will help keep it in place. Then, stick it about halfway through your cake ball. You can use a Styrofoam box or simply an upside-down cardboard box with holes punched out with a pencil to hold the pops as you work. Hold the lollipop stick while you dunk the balls in the chocolate. Roll around until it’s fully coated then let the excess drip off. Place in your Styrofoam or cardboard box to dry.
-
CAKE BALLS: Place the cake balls that you’re working with on parchment paper. Take a spoon and slowly pour the chocolate over the top – letting the chocolate work its way all the way down. If the chocolate isn’t running down the sides quickly, you can add a bit more oil to help it.
-
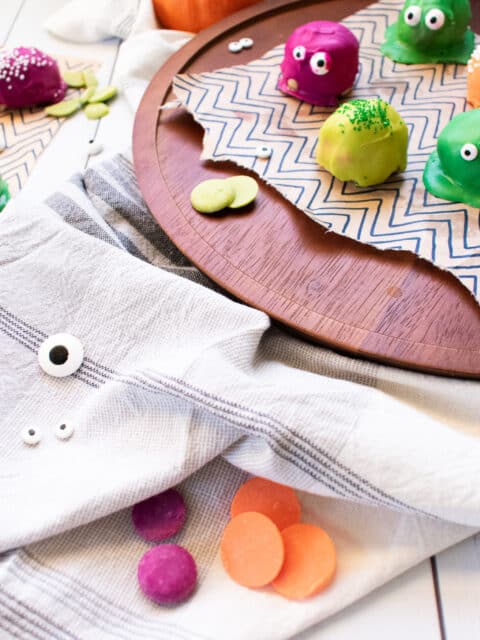
DECORATING: If you’re adding sprinkles or eyes, do it while the cake balls are still wet. Otherwise, you’ll have to dab the back of the eye sprinkles with chocolate or drizzle chocolate over top to give the sprinkles something to stick to. This is the fun part! Add drizzles, sprinkles, eyes, hair, and teeth!
Keep the cake pops cold until you're ready to eat them!