
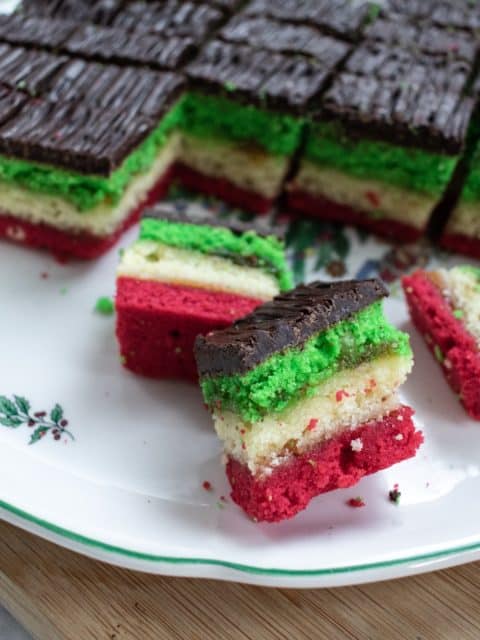
Italian Rainbow Cookies are traditionally made for Christmas, but are still extremely popular throughout the year. They represent the Italian flag and have rich flavors of almond, chocolate, and apricot.
Jump to Recipe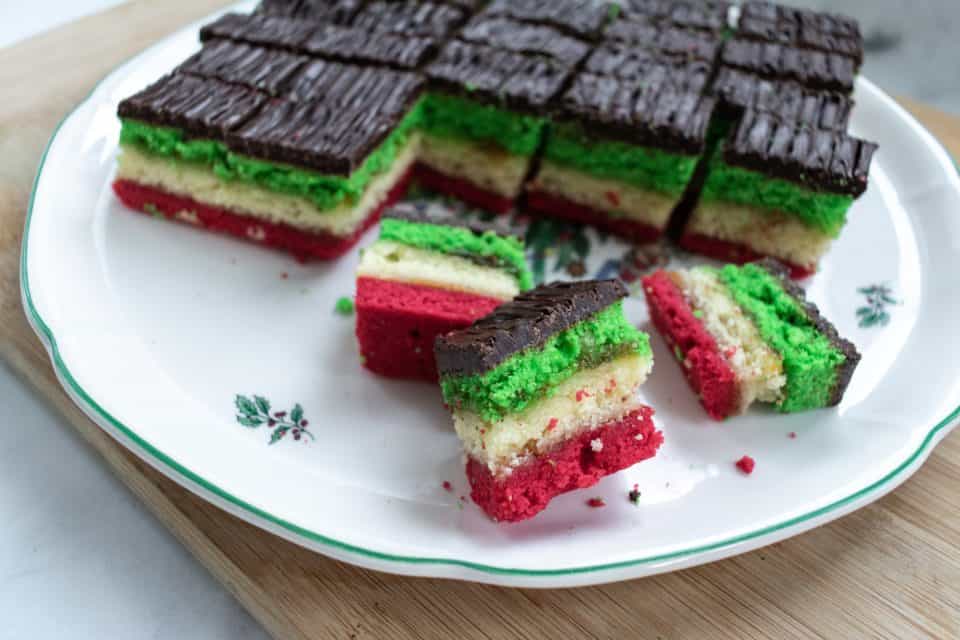
Rainbow cookies are the Italian Christmas cookie you never knew you needed in your life, but once you’ve had it – there’s no going back. I'll always remember being younger and opening the red and white twined box from the bakery filled with Italian pastries and cookies. There were always some rainbow cookies inside with their unmistakable Italian flag colors and almond and chocolate flavor.
Once you start making these at home - I'm afraid there is no turning back! People will continually ask you for them. Plus, there's something about how rewarding they are after having made them from scratch yourself.
HISTORY OF RAINBOW COOKIES
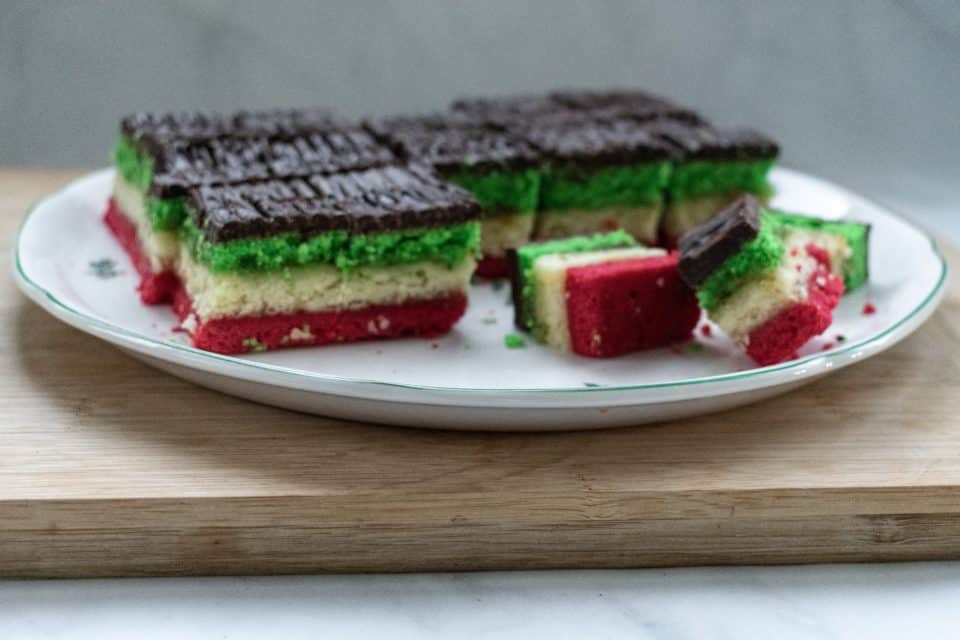
Italian Rainbow Cookies are more of an Italian-American dessert than an Italian one. They started to appear in Italian immigrant communities around NYC in the 1900s. They go by a few names aside from rainbow cookies, like tricolor, seven-layer, and Neapolitans. The three colored layers of red, white, and green cake represent the Italian flag, much like Neopolitan gelato does.
WHAT ARE THEY MADE OF?
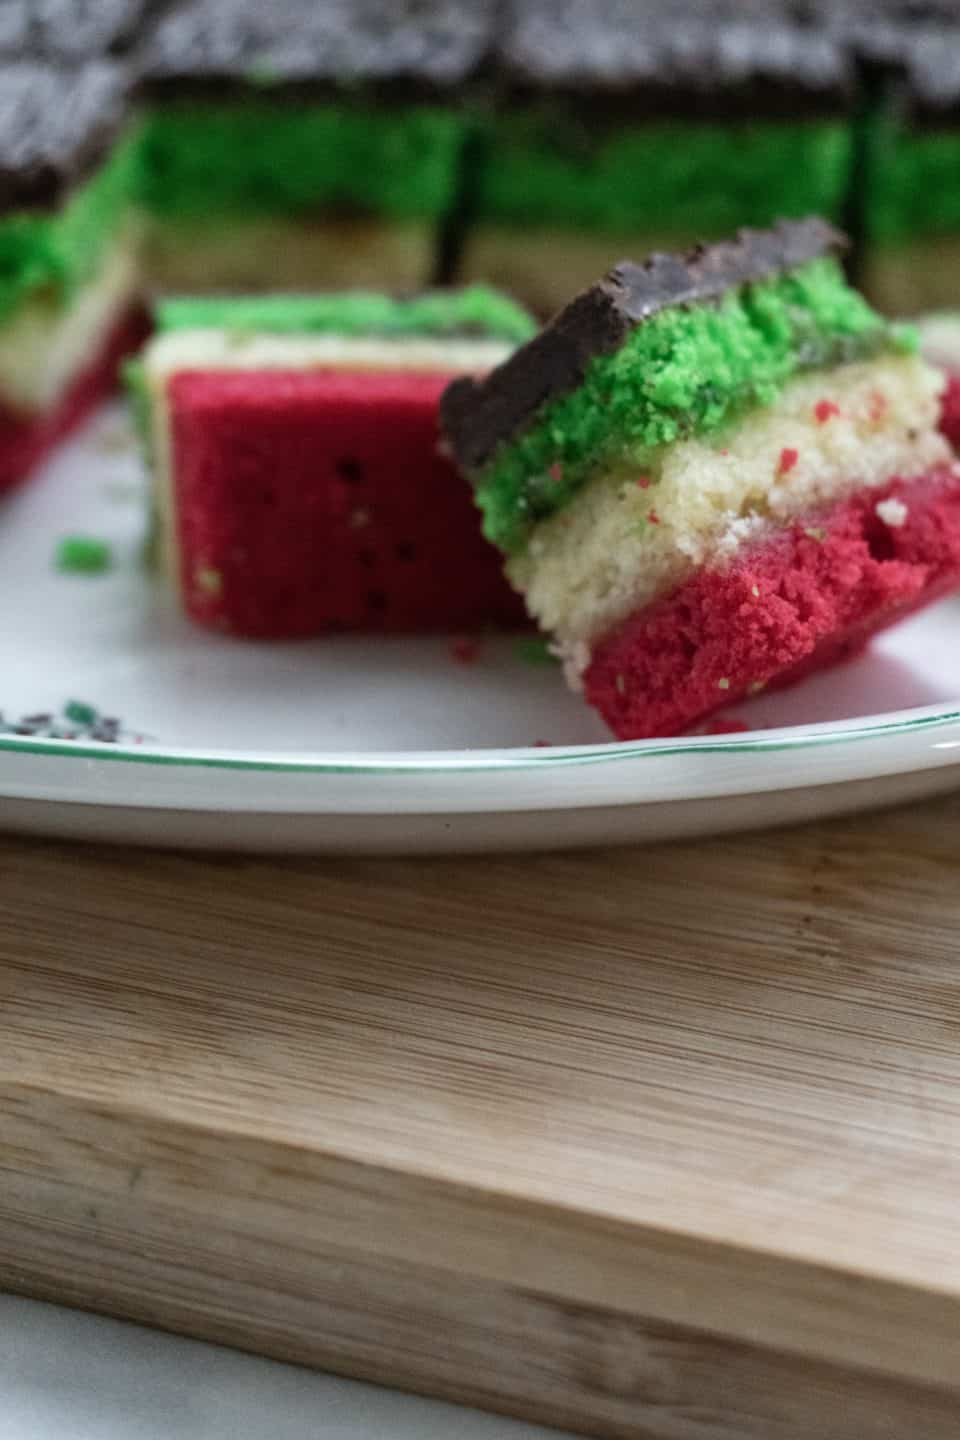
There are three main flavors in rainbow cookies: almond, chocolate, and apricot jam.
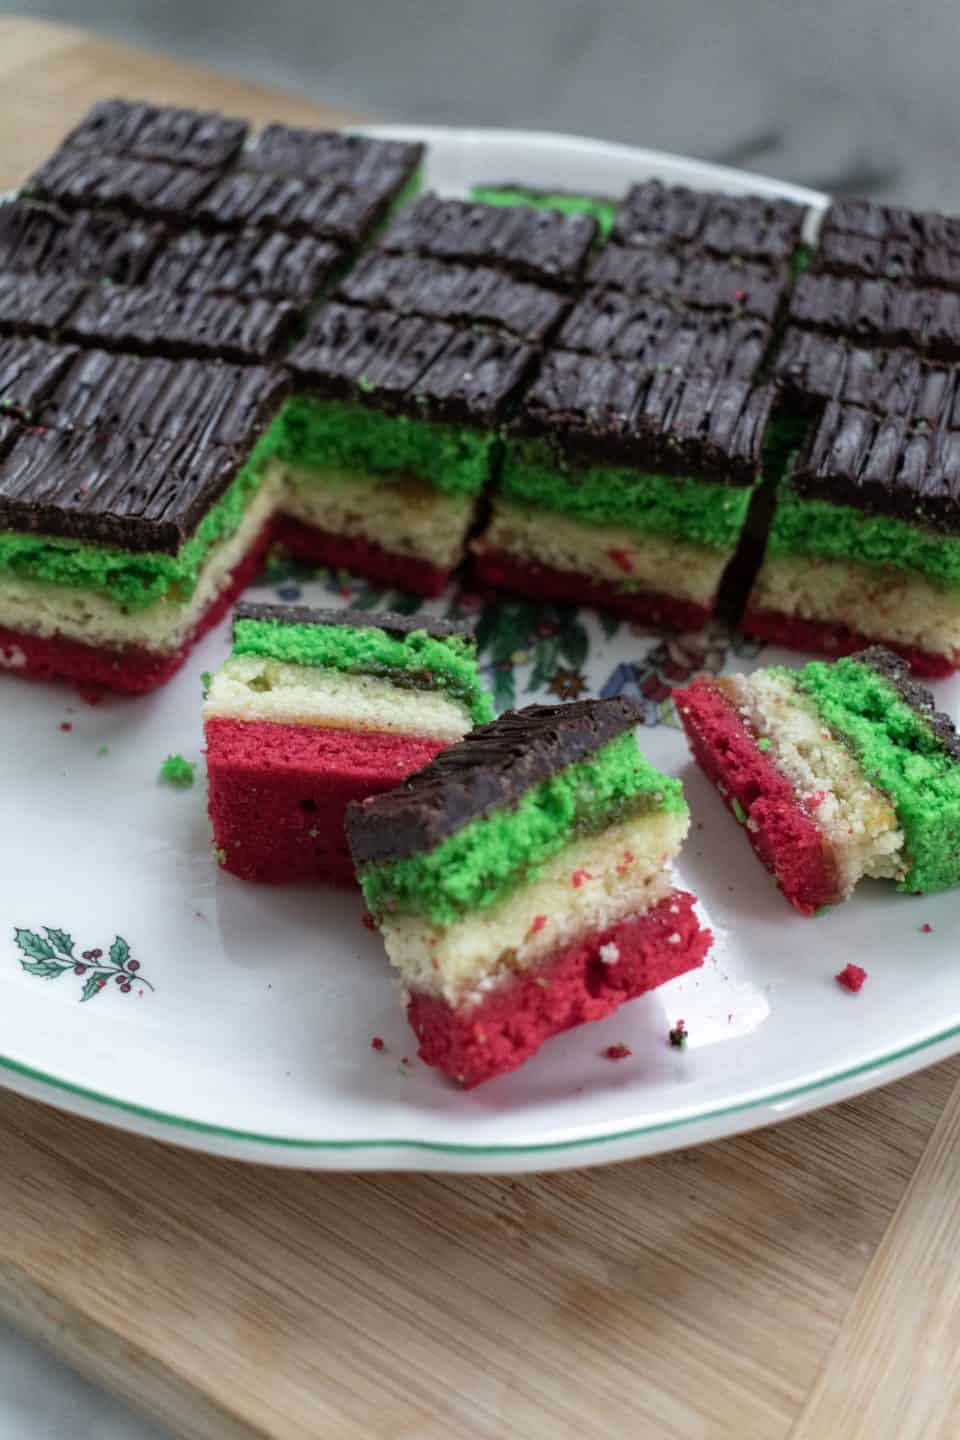
While they're referred to as cookies, they're actually composed of three thin spongy cakes compressed together. That's what everyone is most shocked to hear when I explain them.
These cake layers are a bit different too. Almond paste is a main ingredient and they don't use baking soda or baking powder to rise, but stiff whipped egg whites. All those little bubbles make the cakes rise, similar to a soufflé. Then, holding each layer to each other is a thin layer of jam between each cake.
The whole thing then gets coated in smooth chocolate.
HOW HARD IS IT TO MAKE RAINBOW COOKIES?
I think that Rainbow cookies are fairly easy to make, but people shy away from them because they are made as a huge sheet cake and have several steps. Once you cope with the idea of making 100+ cookies on one sheet pan, I’ll assure you that the hands-on time for this is well worth it. They are also extremely fun to make with others!
OVERVIEW OF MAKING RAINBOW COOKIES:
Here's the gist of how to make them:
MAKE THE CAKE BATTER
- Mix the almond paste with the sugar, making a smooth paste. (The easiest way to do this is with a stand mixer).
- Beat in all the butter and the egg yolks.
- Add in the mixed dry ingredients of flour & salt a bit at a time.
- Whisk the egg whites with the sugar in a separate mixing bowl until they're stiff and hold their shape.
- Gently fold the stiff egg whites into the cake batter.
BAKE THE CAKES
- Divide the batter into three bowls
- Dye one bowl with red dye, another with green dye, and leave the last bowl alone.
- Spread each bowl of batter on its own baking sheet
- Bake each layer for 8-10 minutes
- Cool the cakes
ASSEMBLE THE CAKE
- Spread the apricot jam on top of one layer
- Stack the white layer on top and cover it with jam
- Stack the last layer on top of that and compress with parchment paper, baking sheet, and some heavy things
- Let it compress overnight
MAKE INTO COOKIES
- Take the compressed cake out and spread melted chocolate all over
- Cut the cake into cookies!
Tips while making rainbow cookies:
- Patience. Egg whites need to have “stiff peaks” which is a fancy term for - being stiff enough to hold its shape when you pick up the mixer. It’s important to have patience while whipping these because this is what’s going to make your cake spongy. Give it 8 minutes.
- Smoothing the batter. Almond paste can have a tendency to remain in clumps. Unlike pancakes, those clumps don’t magically cook out, they’ll be in your cookies just as is. So when you’re breaking up the almond paste try to get it as smooth as you can.
- Parchment paper. This is part of the magic trick of layering the cakes on top of each other, don’t skip it! It makes it super easy to lift your cake out of the pan & also assures that it won’t get stuck to the baking sheet and rip.
- Cool to the touch. Not letting cakes cool completely before stacking them increases the chance of them falling apart when you’re trying to invert them out of the pans and onto each other.
- 4 hours minimum. This step is important because it compresses all those layers to form together and not slide off of each other when you cut the cookies. I always let mine form overnight to avoid this.
- Cut when tacky. I made the mistake the first time I ever made them of waiting until the chocolate was fully cooled and hardened to cut the cookies – big mess! The chocolate will be tacky after about 10 minutes and ready for you to cut. Tip: waited too long to cut? Put the whole cake back in the oven for a few minutes to strategically melt the chocolate to be able to cut it!
FAQS
How long do rainbow cookies keep for?
Rainbow cookies will stay moist if stored well for a whole week.
Do I have to refrigerate rainbow cookies?
It's not necessary. They do need to be in an airtight container though.
Can I make rainbow cookies ahead of time?
You can make them ahead of time and then freeze the cookies if you need them further out than a week. Do not try to refrigerate the cake batter to bake later.
Do I need a stand mixer to make rainbow cookies?
It will make the process completely more manageable and much quicker. I have used a handheld mixer to make these and it is much harder only because it takes longer and - your arm hurts at the end!
Whew, okay – hopefully I didn’t scare you off from making these now! But since you now know the most challenging parts of the recipe, you’ll be well equipped to tackle these cookies once and for all. The reaction on people’s faces when they eat them (even if they look messy and aren’t neat like from the bakery) is well worth it.
Note that this recipe is a large batch because since starting this tradition, I need to feed so many people with rainbow cookies that a small recipe is not an option! You won’t ever have too many leftover rainbow cookies, but if you’d rather start off with a smaller batch, cut the recipe in half.
Italian Rainbow Cookies
Ingredients
- 5 sticks of unsalted butter softened
- 4 cups all-purpose flour
- 16 ounces almond paste
- 2 cups sugar
- 8 large eggs whites & yolks separated
- 1 tsp salt
- Red & green food coloring
- 1 ¼ cup smooth apricot jam
- 12 ounces bittersweet chocolate chips
Instructions
-
Prep the pans by laying parchment paper over each baking sheet. Preheat oven to 350
Bake the cookie layers
-
In a large & deep bowl, break apart the almond paste and 1 ¾ cup sugar by beating on medium in a stand mixer until the crumbles start to break up a bit.
-
Beat in all of the butter into the almond paste, half a stick at a time & mix until well combined and the almond become a fine texture. Add in all of the egg yolks, one at a time, blending before adding each additional yolk.
-
In a medium bowl, combine flour and salt. Slowly add one cup at a time to the creamed butter & sugar, blending in between.
-
In another bowl, whisk all of the egg whites until foamy. Add in the remaining ¼ cup of sugar & whisk until peaks form & hold their shape. This will take about 5 minutes in a stand-mixer or 10 minutes with a handheld mixer.
-
Gently fold a third of the egg white mixture into the batter at a time, turning the batter over itself instead of stirring (to not deflate the bubbles). Incorporate the batter entirely with the egg whites. The batter should be foamy.
-
Divide the batter between three bowls. Add several drops of green food coloring to one of the bowls, adjusting to your preference. Gently fold in. In another bowl, add in the red food coloring. Leave the last bowl uncolored.
-
Spread each bowl of batter onto its baking sheet. (One pan for each color). Spread the batter out by wetting an offset spatula (or spoon) and pushing the batter out to the edges of the pan, making the whole sheet as even as possible.
-
Bake the cakes each for 8-10 minutes. They should be fully cooked & just beginning to brown around the edges. Let cool completely in the pans.
Assemble the layers
-
Spread half of the jam over the green layer. Invert the plain cake layer onto a cutting board by placing cutting board on top of baking sheet & turning it over. Peel off the parchment paper & gently slide on top of green layer. Coat plain layer with remaining jam & repeat the same method to stack red layer on top of plain layer
-
Cover the cake with plastic wrap & place one of the baking sheets on top of the cake. Put this in the refrigerator & evenly weigh down with heavy cans or containers. Let cake compress for at least 4 hours, or overnight.
Cutting the cookies
-
Remove cans, baking sheet, & plastic wrap. Place the cutting board on top of the cake and flip to invert it onto the cutting board. Remove parchment paper.
-
Trim the cake wit a sharp knife, so it is even on all sides.
-
Melt the chocolate in a microwave safe bowl, stirring every 30 seconds. Using an offset spatula or spoon, spread the chocolate evenly all over the cake. Let set slightly.
-
While the chocolate is still tacky, slice the cake into rectangular pieces with a sharp knife. (For a clean cut, wipe knife clean of chocolate in between each cut). Slice about 10 strips horizontally & 13 columns vertically, making 130 pieces (roughly 11 dozen). Now, go find some friends to share these masterpieces with!
Recipe Notes
Equipment needed: 3 (15x9) baking sheets, large cutting board, parchment paper Note: The cake needs to be compressed for at least 4 hours before cutting it into individual cookies. This recipe is much easier with a stand mixer than a handheld electric mixer. Store in an airtight container for 10 days.

 Yum
Yum
Leave a Reply